EUT09 - Operator obligations
Periodic inspections and cleaning tasks
To ensure safe operation, the operator must ensure that the robot is in perfect condition. The recurring inspections must be carried out at the specified intervals.
This is NOT a complete Betreiberpflichtenheft. This document only covers periodic inspections and cleaning tasks. For example, it does not contain specifications on the interface and restrictions about changing the factory layout.
.png?inst-v=623fd237-c9af-448b-8290-279da381d7b9) | Warning! |
|---|---|
Risk of injury! Switch off the robot via the power switch before any repair or cleaning. |
| Warning! |
|---|---|
Risk of injury! Press the emergency stop button before each test. |
Daily tasks
 | Notice! |
|---|---|
The following tasks need to be performed on a daily basis. The operator is obliged to carry out these tasks as specified in the SOTO Operating Manual. |
Magazino strongly recommends documenting all carried out inspections and tests.
Functionality Test of Emergency Stop Buttons and Reset Buttons
For each of the four emergency stop buttons on SOTO:
Push the emergency stop button. Check whether this is reflected on the display.
Release the emergency stop button. Check whether this is reflected on the display and the reset button is blinking.
Press the reset button. Check whether the robot is operable again.
Daily Visual Inspection
Perform the following visual inspection tasks. In case of damage, contact support.
Visually inspect SOTO’s wheels for obvious damage
Visually inspect SOTO’s external covers for damage
Visually inspect SOTO’s backpack shelf for bent or damaged parts. Pay special attention to the box stoppers at the front of the backpack.
Visually inspect SOTO’s interior and its gripper for coarse dirt and foreign objects. Remove foreign objects and dirt if necessary.
Visually inspect SOTO’s interior and gripper for damage.
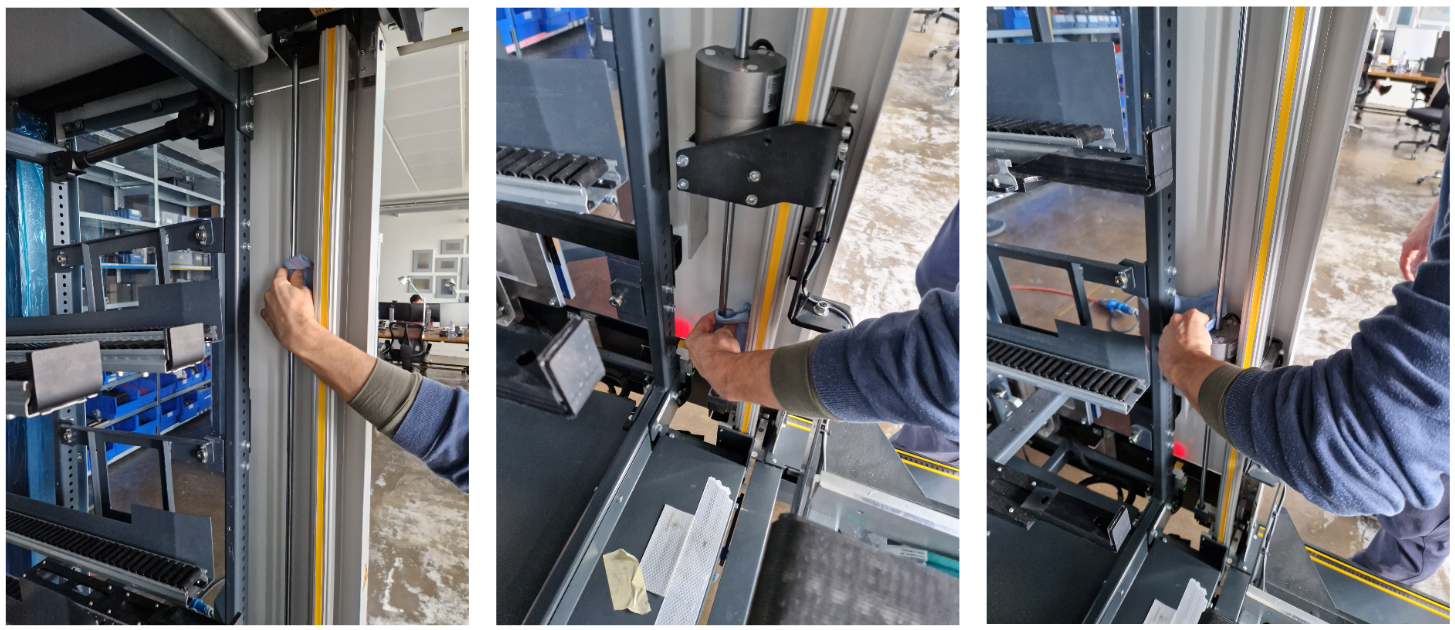
Inspect SOTO’s four vertical axis covers for damage (see Figure below). The vertical axes are located at the four corners of the gripper space. Gently run a finger over the vertical axis covers. If any curvatures are detected, please contact support. Pay special attention to the bottom of the vertical axis.
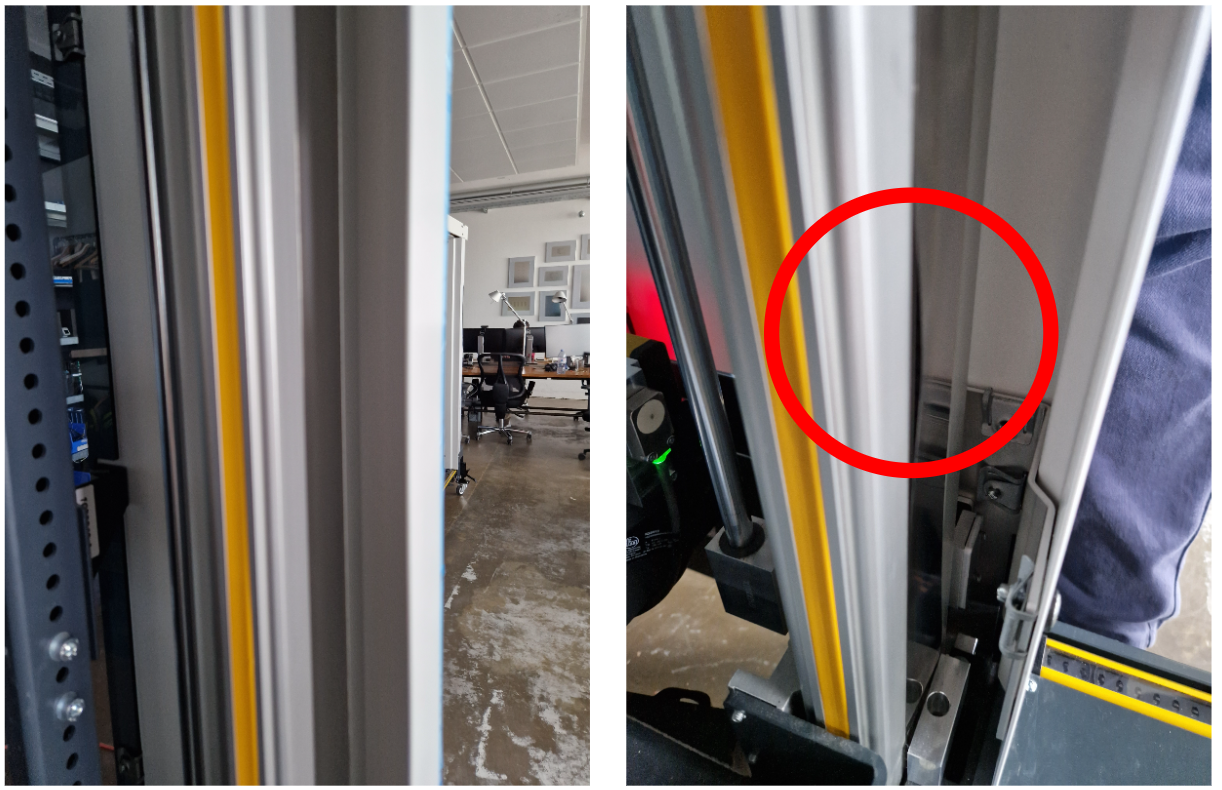
Vertical axis cover without damage (left) and with damage (right).
Weekly tasks
| Notice! |
|---|---|
The following tasks need to be performed on a weekly basis. The operator is obliged to carry out these tasks as specified in the SOTO Operating Manual. |
Magazino strongly recommends documenting all carried out inspections and tests.
Weekly Visual Inspection
Perform the following visual inspection tasks. In case of damage, contact support.
Check whether all four LED strips are functional. They should blink red when the emergency stop button is pressed.
Visually inspect the KLT press for wearing and damage.
Visually inspect the conveyor belts for wearing and damage.
Visually inspect cameras and sensors for damage:
Safety laser scanner (3x) and top laser scanner.
Barcode camera in the gripper.
Depth camera in the gripper.
Binary sensor in the gripper.
Depth camera above the KLT press.
Binary sensor on the KLT press.
Navigation cameras front and rear.
Visually inspect SOTO’s charging station for damage.
Visually inspect all shelves and shelf adapters. Ensure that
Shelves are in their modeled position (within tolerances)
The areas around the docking shapes are kept clear
Shelf adapters are not displaced and damaged
QR codes and reflective tape on the adapters are not damaged
Light Curtain Alignment Verification
Verify that SOTO’s light curtains are correctly aligned using the blue diagnostic LEDs.
Shut SOTO down via Tools → “Shut down robot”
Turn SOTO off via the physical switch
Turn SOTO back on via the physical switch and wait until the blue diagnostic lights show up on the light curtains. They will remain visible for two minutes.
Check the blue diagnostic LEDs on each of the four light curtain receivers (see Figure below). The light curtain receivers are located at the bottom of each of SOTO’s four openings. If a light curtain indicates two or less blue LEDs, contact support for re-aligning the light curtains.
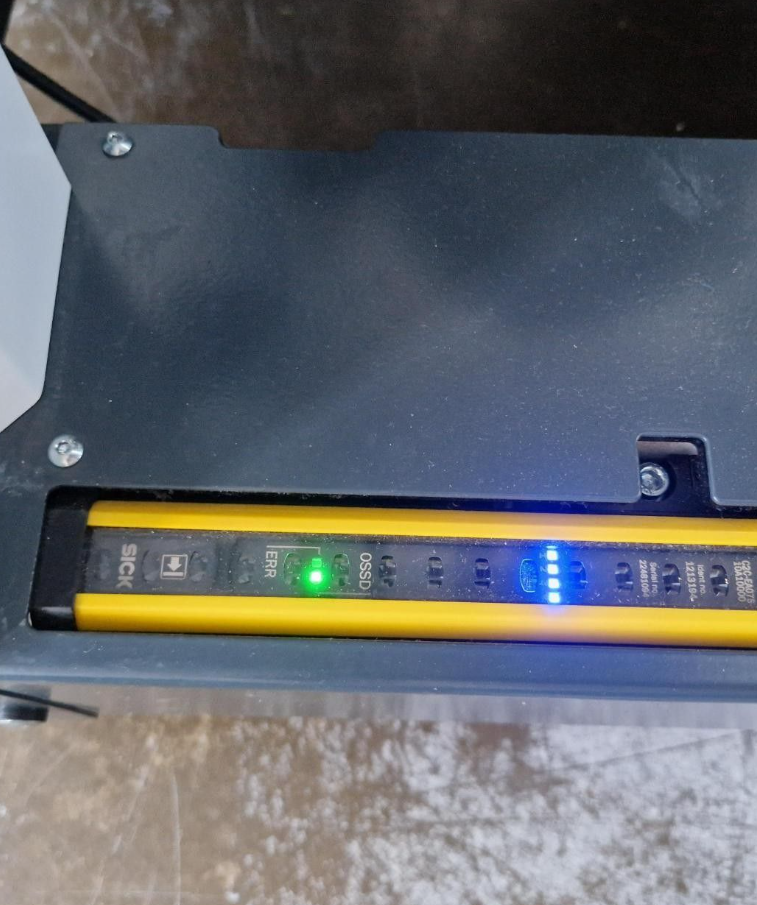
Light Curtain Functionality Test
For each of the four light curtains (securing the opening of each of SOTO’s four sides), perform the following functionality tests with a test rod of 14 mm diameter:

.jpg?inst-v=623fd237-c9af-448b-8290-279da381d7b9)
Move the test rod slowly through SOTO’s opening, as indicated by the arrow (see Figure below). Pay attention to guide the test rod along the edges of the opening. Watch the OSSD LED on the receiver during the check. The OSSD LED on the receiver should continuously light up red (see Figure below). The OSSD LED must not illuminate green.
Cleaning of Vertical Axis Brake Rod
Clean and degrease each of the two brake rods of the vertical axis (located between the backpack and gripper space).
Press the emergency stop button to make work on the robot safe.
Take a paper cloth and moisten it with metal cleaner / degreaser.
Wipe the two brake rods of the vertical axis (above and below the brake), and the brake itself with the cloth.
Release the emergency stop button.
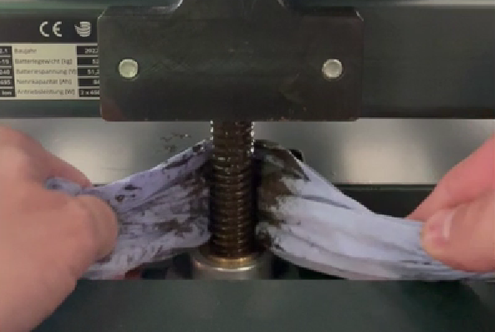
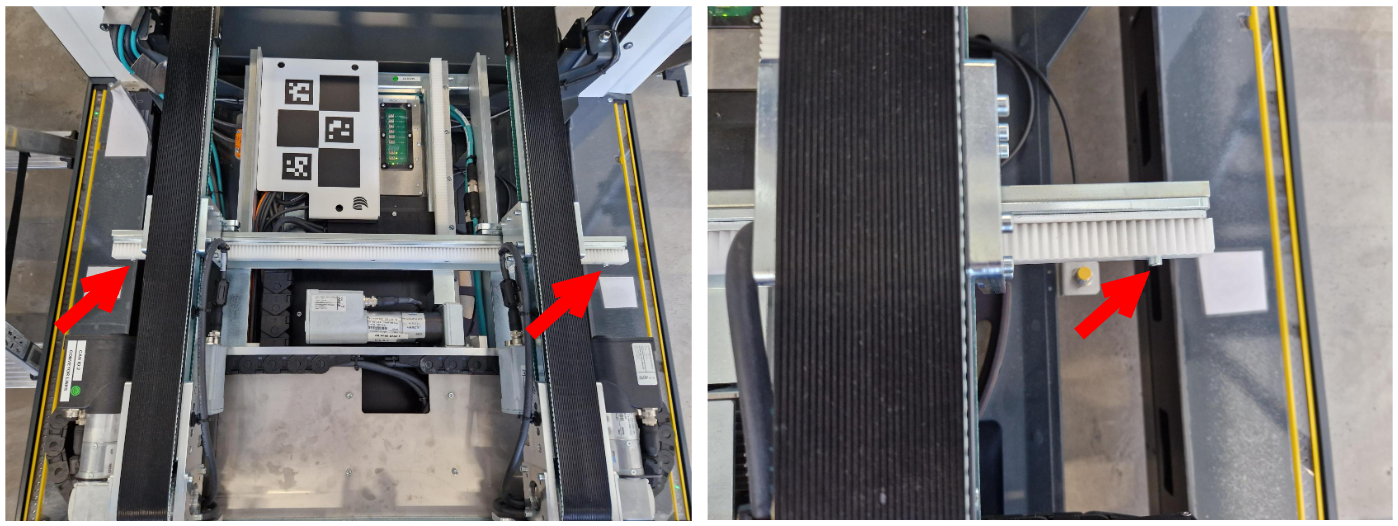
Cleaning of the Conveyor Belts
Clean the two conveyor belts in SOTO’s gripper.
Press the emergency stop button to make work on the robot safe.
Take a paper cloth and moisten it with alcohol cleaner.
Wipe the top surface of the conveyor belt with the cloth.
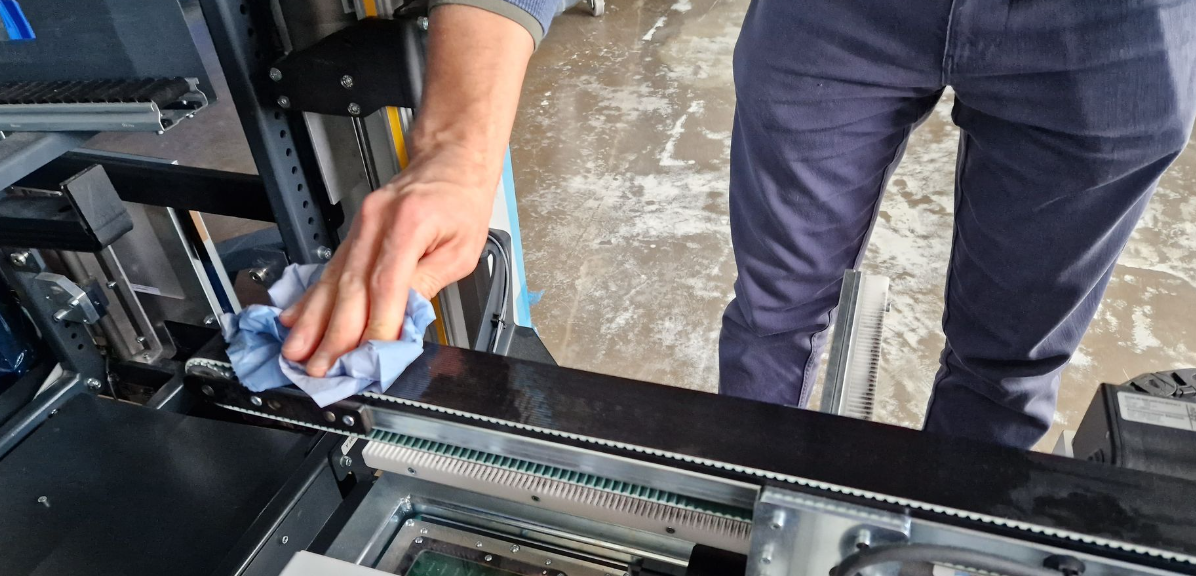
Push the conveyor belt to the back (see Figure below), and wipe the top surface of the conveyor belt. Repeat until the entire belt is clean.
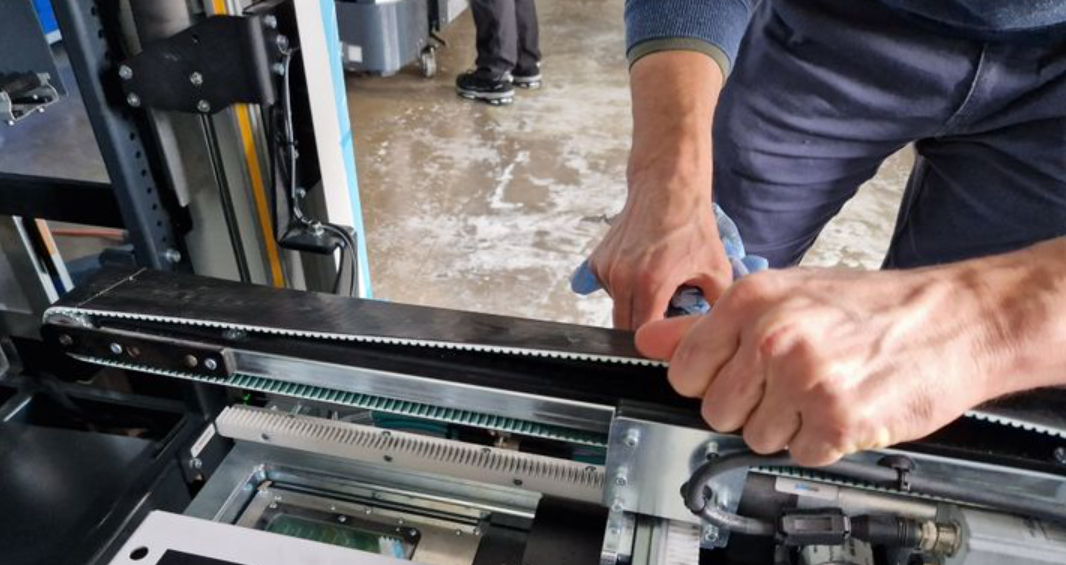
Repeat the procedure for the second conveyor belt.
Release the emergency stop button.
Cleaning of Cameras and Sensors
For each of the sensors in the list below, perform the following steps:
Carefully remove dust from the sensor with a dust brush
Moisten a clean, lint-free cleaning cloth with antistatic plastic cleaner
Carefully clean the sensor with the cloth. Apply as little force as possible to not move the sensor from its position.
List of sensors to be cleaned:
Safety laser scanner (3x) and top laser scanner.
Barcode camera in the gripper.
Depth camera in the gripper.
Depth camera above the KLT press.
Navigation cameras front and rear.
Light curtains (8x).
Vacuum Cleaning of SOTO’s Interior
Carefully remove dust and dirt from the robot’s interior with a vacuum cleaner. Make sure to not touch sensors with the vacuum cleaner.
Monthly tasks
| Notice! |
|---|---|
The following tasks need to be performed on a monthly basis. The operator is obliged to carry out these tasks as specified in the SOTO Operating Manual. |
Magazino strongly recommends documenting all carried out inspections and tests.
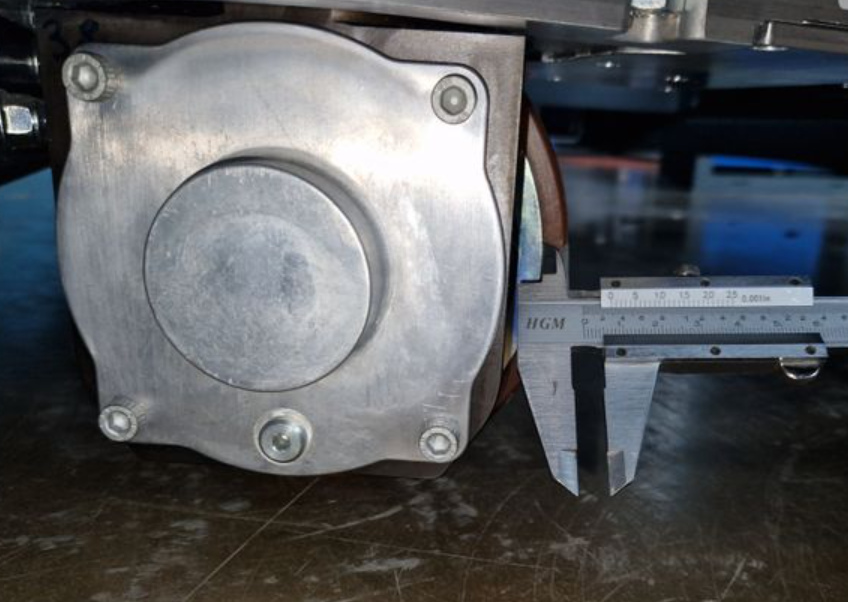
Driving Wheel Wear Check
Press the emergency button to make work on the robot safe.
Measure the thickness of the rubber of the SOTO’s drive wheels with a caliper. The two wheels are located at the front right and rear left of the robot. If the thickness of the rubber is below 3.5 mm, contact support. The wheel has reached the maximum abrasion.
Release the emergency button.
Check for Blocked Rollers
Press the emergency button to make work on the robot safe.
Check the rollers in the backpack shelf for ease of movement. Move your hand over the rollers for each backpack compartment. If some rollers are blocked, contact support.
Release the emergency button.
Degreasing of Backpack Spindle
Change SOTO’s operating mode to “Manual Mode” through the robot icon on SOTO’s display.
Tilt the backpack towards the front of the robot, using the “A” key of the controller. You can find the controller behind the bottom cover in the rear of the robot. The spindle should now be visible from the rear of the robot.
Press the emergency button to make work on the robot safe.
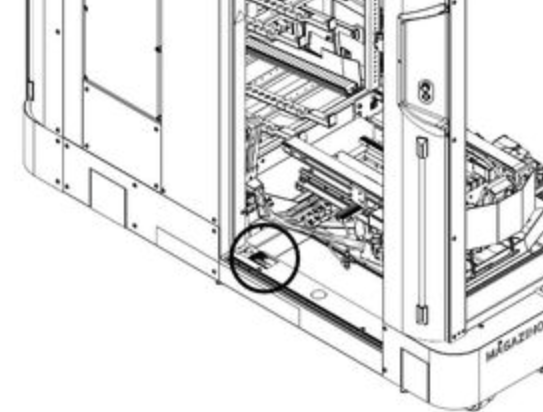
Use a paper towel to remove excessive grease from the spindle (see Figure below). Do NOT use any degreaser.
Underneath the robot (better access from the rear side), locate the ZIMM gear and remove its closing cap (see Figure below). The cap might be difficult to remove, since the gap between the metal tube and the aluminum cap is small. It is recommended to first use a small screwdriver to separate them, and then a large one to pull them apart.
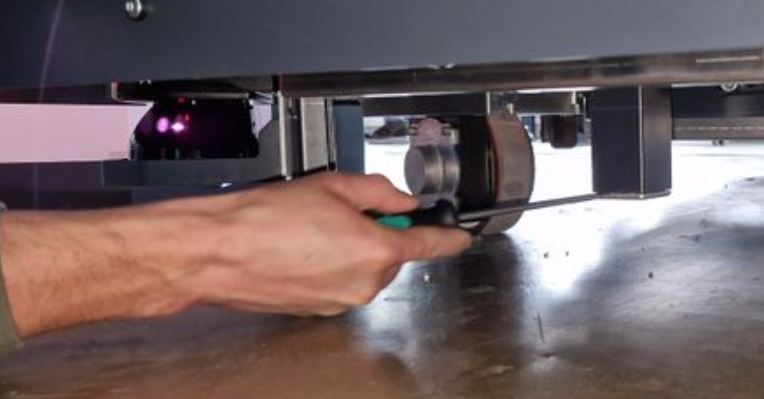
Remove any residual grease from the cap.
Place the cap back in. The space between the cap and the floor is limited. Therefore, we recommend placing the cap by hand and use the floor as a pivoting point, together with a rubber hammer or a large screwdriver to push the cap up.
Release the emergency button.
Inspection of the gripper’s end stops
Check whether the gripper’s end stops work properly.
Visually inspect the gripper’s end stops in x-direction (one screw) for obvious damage.
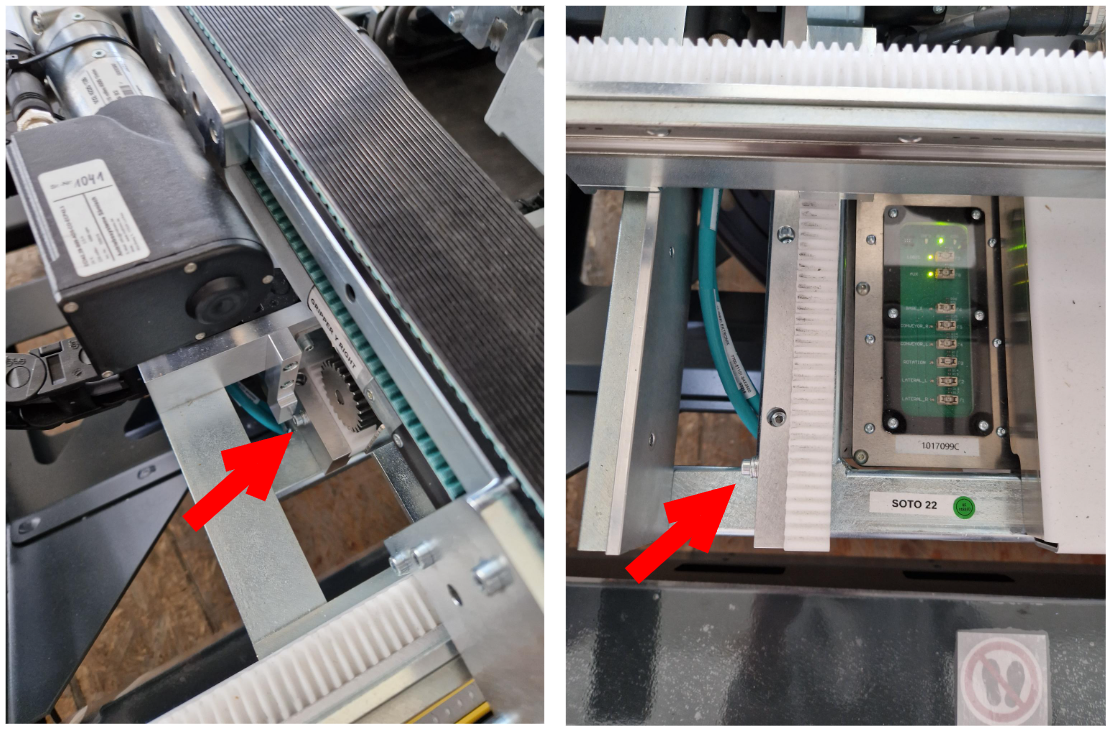
Visually inspect the gripper’s end stops (two screws) in y-direction for obvious damage.
Move the conveyor belts all the way to the front and back in x-direction. They should be physically stopped by the end stops.
Move the conveyor belts all the way to the outside in y-direction. They should be physically stopped by the end stops.
In case of failure, please immediately contact support.
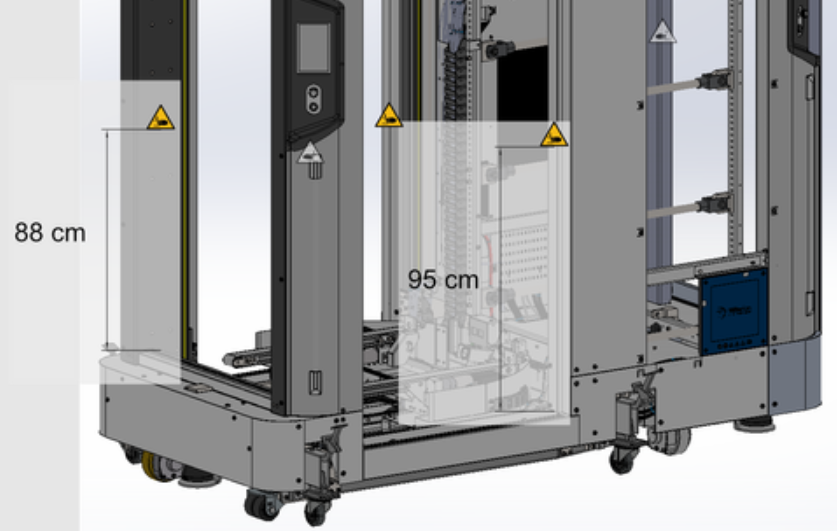
Warning Label Check
Visually check the warning labels on the robot for completeness and legibility.
Crushing hazard (6x)
“Do not step in/on” Stickers (4x, one at each opening)
Warning sticker for SOTO charging station adapter cable
Electricity warning sticker at charger door
Blue inductive charging plate sticker (on charging pads of each charging station and each robot)
Stickers at physical on-off switch (2x): “Shut down on display first.”
Camera warning symbol